
Vinyl-liner pools have continued their evolution into more intricate and customized amenities. While this has made the product more appealing to consumers, it also places more demands on installers.
“The current trend is that there are a lot of vinyl-over features, meaning there are a lot of steps, benches, tanning ledges and other features that are being constructed inside the pool,” says Alvin Geetan, design manager for Megna Pools, a manufacturer of package pools and vinyl liners in Pickering, Ontario, Canada. “Pools are getting a lot more complicated. ”
Geetan sees another trend, as more builders choose to build their own features out of concrete, removing the factory precision that comes with pre-made components such as fiberglass or steel stairs.
“That means it can become much more difficult to fit the vinyl liner over something like that, especially if it’s not straight or plumb,” he adds.
For all these reasons, builders and installers need to take extra care when measuring and installing vinyl liners. Here, manufacturers explain how to avoid some of the most commonly made mistakes when measuring, ordering and installing vinyl liners.
Supply adequate information with your order.
Start by using the form provided by the manufacturer of the liner you will be ordering.
Each producer asks for a different set of measurements, based on their own CAD software, and they code things differently. If you provide the measurements based on another manufacturer’s form, you may be required to redo your work, if the producer doesn’t have everything they need, says Gregg Minton, southeast regional sales manager for Tara Pool & Outdoor Products in Owens Cross Roads, Ala.
If taking A-B measurements, make sure the stakes are far enough away from the pool and each other. It isn’t as simple as placing the stakes at least 3 feet away from the pool.
“You need to envision a line going to infinity in both directions between your A and B [points],” Minton says. “If you go between A and B, and infinity past B and then infinity past A, that entire line cannot be any closer than 3 feet to the pool.”
When using the measuring tape, make sure it does not brush up against anything that could trip it up and throw off the measurements, says Marc Cornely, technical sales representative for Merlin Industries of Hamilton, N.J.
“It could catch on something — say, a brass anchor from the installation of the pool cover or some other kind of obstruction sitting on the deck,” Cornely says. “Then the tape is not going in a straight line from A to the point that’s being measured. Therefore the measurement [reads] longer than it actually is, so the points will not plot out correctly and reflect the pool’s shape.”
After you’ve finished taking measurements, check your work before leaving the site, advises Roshan Patel, technical support representative for Pegasus Products in Branchburg, N.J. If certain measurements are supposed to add up to a specific number, for instance, make sure they do.
“Sometimes when I get [the order], the installer has already left the job site,” Patel says. “So I’ll say, ‘Five plus five plus five equals 15, but this says the pool is 16 wide. Where is the disconnect? How do we need to change the measurement?’”
Also be sure to supply true measurements. Manufacturers recommend against fudging the numbers to yield a tighter liner.
“Some say, ‘Even though the pool is 18 feet wide, I’m going to say it’s actually 17 feet 10 inches wide. Then I’ll get the liner really small and it’ll stretch it into place,’” Patel says.
But keep in mind that manufacturers already size the liner to fit snugly. If the liner is too tight, it can withstand undue stress over time, resulting in premature wear.
“If the dealer tends to shorten or shrink the measurements … then we shrink the measurements, then they’re twice shrunk,” Minton says. “That can lead to an extremely tight fit, which looks good in most cases, but it’s detrimental to the life of the liner.”
Take extra care with replacement liners.
When replacing a liner, you’re working with a pool has existed for years. You may not know the original builder’s quality of workmanship, and things just may have shifted over time. For this reason, you may need to take extra steps to make sure you provide true measurements for the pool.
On a simple rectangle, that may mean taking diagonal measurements to ensure the pool is built square, Cornely says.
“It could be like a trapezoid and you can’t even see it with the naked eye,” he says. “You can only catch that with measurements.”
When taking diagonal measurements on radiused corners, measure from where the 90-degree corner would form if the walls went straight and met at a point, rather than curving at the corners.
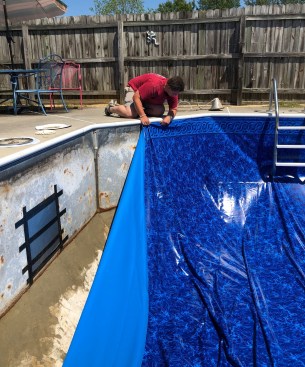
Photo courtesy Tara Mfg.
“Don’t take them to the middle of the radius that forms the corner,” Cornely adds.
When measuring an existing pool for a replacement liner, also mark where the pool wall is underneath the coping, and measure to there.
“The A-B measurements need to be taken to the top of the pool wall,” Cornely says. “If the coping overhangs the wall … you need to put chalk marks down on top of that coping, exactly above the pool wall. If that’s not done, the liner can be too small or too big.”
When the measurements are complete and verified, the chalk marks can be removed.
Keep talking to manufacturers after the order is placed.
Don’t expect that your communication with the manufacturer will end once the vinyl order has been placed.
If, for instance, you ordered the liner based on the dimensions indicated on the dig specifications, you’ll need to notify the producer if pool’s dimensions don’t end up as planned.
“[Builders] may buy the pool package to have a 6-foot depth,” Patel says. “But while they were in the pool digging, maybe they hit rock or the water table is higher than expected. So maybe the pool ends up being 5 feet deep. Remember to tell us.”
Also understand that the manufacturer may call with more questions. After taking your A-B measurements, consider keeping the stakes in place until the manufacturer says they have everything they need.
“As long as those A-B [stakes] have not moved, you can give us the additional detail we require, and save yourself re-measuring the pool from scratch,” Geetan explains.
Once the liner arrives, if you have a difficult time fitting it into place, stop everything and contact the manufacturer. Don’t continue with the installation, expecting the weight of the water to fix any problems.
“That’s not an ideal way to get rid of wrinkles, by adding water to push it out,” Patel says. “It’s supposed to be smoothed out when you’re setting the liner.”
When communicating a problem with the manufacturer, provide multiple photos — some framing the whole pool, others showing close-up details of the problem areas, Geetan says. If they’re to help, fabricators will need to see not only a problem wrinkle, but also the whole pool and how that wrinkle fits in the scheme of things.
While snapping the images, keep the vacuum on. Otherwise the liner will be sitting slack, and manufacturers can’t get a true idea of how it’s fitting or how to fix the problem.
Properly pull the liner
When placing the liner, you often can tell if there’s a problem before using weights, suction or water to help stretch and secure it.
“You can tell if a liner is hanging in the right position by looking at the wrinkles in the fabric before you even turn a vacuum on,” Minton says. “If the wrinkles are going straight up and down, or very close thereto, then the liner’s positioned properly. But if, like in a radius, the wrinkles are at a diagonal, then something’s not aligned properly.”
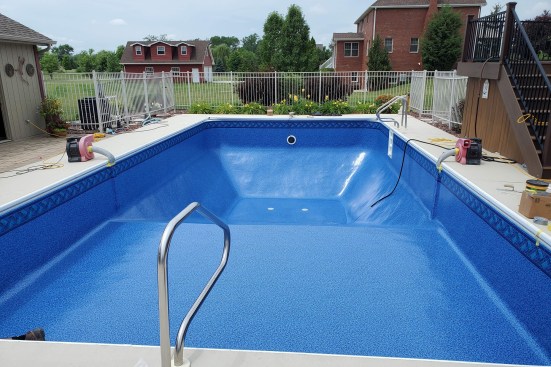
Photo courtesy All Seasons Pools & Spas/Loop-Loc
Ideally, the vacuum should bring the liner as tight as a coat of paint before water is even added to the pool. For larger pools, more than one vacuum may be necessary.
When filling the pool, make sure to secure things in place with water bags, salt bags or other weights. If the liner is left loose, it will likely pull down when water is added, potentially dislocating the liner from special features such as shelves and benches.
You also run the risk of the shallow-end liner being pulled toward the deep end: As the deep end fills first, the accumulating water places more weigh tin the deep end, yanking down on the fabric at the other end of the pool.
Installers can avoid this by creating a dam of water bags, salt bags or other appropriate weights at the shallow-end break, right before the slope starts.
“Put a row of heavy bags along that break line and then put water in the shallow end,” Cornely says. “[The water will] start to pour over the dam between the bags at some point, but ½ inch or 1 inch of water in the shallow end locks that vinyl in place. Then as it fills the deep end, the vinyl that’s supposed to be in the shallow end stays in the shallow end.”
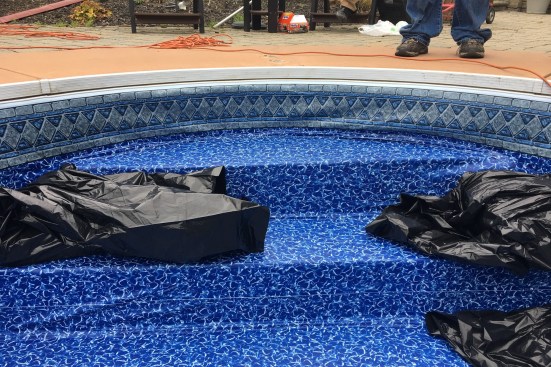
Photo courtesy Merlin Industries
Weighing down steps, benches and other special features can help secure them in place while the liner is stretched in place.
Make sure the suction is adequate. The liner should cling to the walls and floor when the vacuums are activated. If that is not occurring when the vacuum is activated, then you may need more vacuums, or stronger ones.
Don’t cut the fittings too early.
When you want to move to the next job, it can be tempting to speed through the installation process, set up the pool to fill and go. But that’s not necessarily the best course of action.
For instance, many installers cut their liners to accommodate fittings too soon in the process, Patel says. They may start doing that before water has begun stretching the liner. But once the water fills the pool, things will likely shift, no matter how tightly it’s vacuumed.
Don’t cut the fittings until after the weights have been placed in the shallow end and, perhaps, the corners and steps, and the water is about to reach the fitting.
“As you fill, you’ll see it stretches in,” Patel says. “And then as the water’s getting close to the step, that’s when you cut it out, or when it’s getting close to the skimmer, that’s when you cut it out.”
The same holds true for cutting around steps, Cornely says.
Try to avoid cold-weather installation — or at least make adjustments.
Even in the cold-weather states, pool construction is becoming a year-round enterprise.
When it comes to vinyl-liner pools, however, builders need to take precautions. Liners, especially thicker ones, have a harder time stretching when it’s below 60 degrees Fahrenheit.
“Especially on some of the more complicated liners, or 28-mil liners, they don’t stretch as well when its cooler, the sun’s lower in the sky or on cloudy days, or if they’ve been stored in cool places,” says Jeff Duke, national sales manager of Loop-Loc in Hauppage, N.Y.
It becomes even more difficult if the installation has steps, benches and other special features. Those areas are even more resistant to stretching.
If there’s sun on one side of the pool and not the other, the sunny side will stretch more, distorting the installation, Duke adds.
Don’t install in the cold weather if you can avoid it. But if you must, begin by letting the manufacturer know. They likely will cut the liner differently than a spring or summer installation. Ask for any advice they might offer for measuring and installing it.
Once you receive the liner for cold-weather installation, store it indoors at room temperature for several days before its set in place. Use domes or tenting systems, heaters and other methods to warm the site. You also may need to use more vacuums than normal to provide stronger suction to pull the liner.
The same holds true for water bags, salt bags or other appropriate weights — you may need more than normal to pin the liner in place, as it will be more resistant to stretching.